
Scenic Painting Tips and Tutorials
Scenic Paints
Scenic paints are used in theatrical and themed environments to create visual illusions on scenery or backdrops. Whether it be for a scrim that acts as a backdrop for a scene or flats that are painted to emulate textures or surfaces, scenic paints are specially formulated for use by scenic artists.
Scenic paint is comprised of four important elements: pigment, a vehicle, a binder, and filler. Pigment is a colored particulate that is completely or nearly insoluble in water. It is what gives paint its color. The liquid pigment is added to is made up of two parts, the first being a vehicle, which allows paint to spread and eventually evaporate from or become absorbed by a surface. The second part is a binder, which acts as the glue that adheres to the pigment particles. Finally, filler is some substance that increases the opacity of the paint. The higher the opacity, the better the coverage.
Scenic artists thin out paints by adding more of a scenic paint’s vehicle. This wash allows less-saturated scenic paint colors to be mixed. This must be done with care however, as thinning scenic paints too much will make it difficult for the paint’s pigment to adhere to the surface. This could potentially result in paint rubbing off onto costumes and actors – oh no!
Most present-day scenic artists work with water-based latex paints. Occasionally, a scenic artist may use different types of paints or solvents. It’s always best to understand the scenic paint(s) you are working with by reading its Safety Data Sheet (aka “SDS”). A Safety Data Sheet details how to use a scenic paint or product safely, suggested protective gear, and instructions for cleanup.
Scenic Artistry and Technique
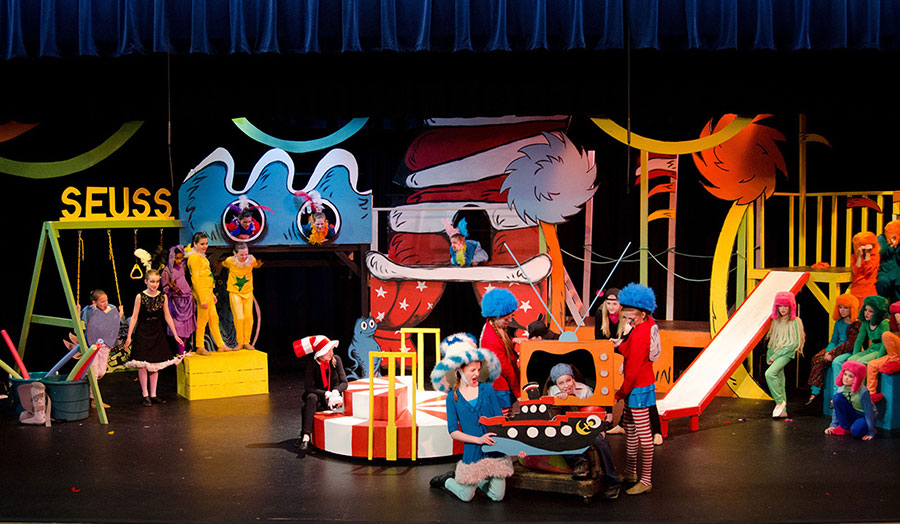
Scenic artists are commonly employed to create visual illusions, for example, a scene painted onto a two-dimensional backdrop that creates perspective, or faux surfaces like wood grain, metal, stone or brick. Sets are typically built using inexpensive materials, but with scenic artistry, these materials can be painted to appear much richer, detailed or ornate. Scenic artists use a variety or brushes and techniques to achieve these effects.
Scenic Paint Brush Types
Priming Brush: a wide, thick brush used to cover large areas quickly
Lay-in Brush: a flat-tipped brush with a thick ferule of bristles which carry large amounts of paint
Graining Brush: a brush which is cut to leave unpainted areas in order to create a wood grain effect
Liner Brush: a flat edged brush used for outlining and detail work
Sash Brush: a steeply angled brush used for cutting in against trim or window framing
Chip: a commonly available, inexpensive brush used for dry-brushing, a technique where a brush is relatively dry but still holds paint and creates a scratchy, textured look when applied to a surface
Roller Brush: a cylindrical napped brush, used to roll paint onto a surface
Scenic Paint Application Techniques
Trompe l'oeil: Realistic painting that creates an illusion of three-dimensionality. It's often used for architectural details or to make flat surfaces appear to have depth.
Grisaille: Using a monochromatic grey palette to create depth and dimension. It's often used to create a base layer of tonality before adding color.
Scumble: Using a dry brush to apply a light layer of paint to create a soft, hazy effect. It's often used to create atmospheric effects like clouds or mist.
Glazing: Using transparent layers of paint to create a luminous effect. It's often used to create the illusion of light passing through stained glass or to create a sunset effect.
Spatter: Flicking random small drops of paint from the ends of brush bristles onto a surface
Dry brush: Dragging a nearly dry brush across the surface of a base color in order to create a scratchy or streaked effect
Sponging Using a sponge to apply paint to create a mottled, textured effect. It's often used to create the illusion of textured surfaces like stone or brick.
Stipple: Using the blunt ends of brush bristles to stamp small dots of color onto a surface, creating a dotted visual effect.
Scraffito: Using a sharp tool to scratch away layers of paint to reveal the layers underneath. It's often used to create the illusion of texture or add detail.
Rag roll: Using rags twisted together, dipped in paint, wrung out and rolled across a painted surface to create special effects like marble grain, velvet or silk
Layers (or Coats): Applying multiple layers of paint to a surface to deepen color and saturation
Prime coat: a layer intended to seal the surface of an object and provide a uniform surface for a base coat
Base coat: a foundational coat which determines the hue and value of the finished piece
Texture coat: a thick coat of paint, plaster or other medium applied to add texture to a surface
Top coat: a final coat, usually clear or lightly tinted, which adds sheen to a finished base or texture coat
Subcategories